
How To Remove Gel From Nails At Home
📖 Table of Contents
I remember the first time I tried to remove gel nails at home. I had a full set of French tips that had started to lift at the edges, and I was desperate to get them off without damaging my natural nails. I had watched a few tutorials online, but nothing prepared me for the reality of how long, tedious, and sometimes painful the process could be. The goal was simple: to get my nails back to their natural state without any cracks, splits, or visible damage. But what I didn't realize was that I was missing a few key steps that could make a huge difference in the outcome.
I had always thought that removing gel nails at home would be a quick fix. I was wrong. It took me nearly 45 minutes just to get the gel off my thumbnails, and even then, my nails looked worse than before. I had used the wrong type of remover, and I didn’t apply enough pressure when scraping the gel off. The result was a mess: my nails were dry, brittle, and I had tiny chips all over them. That moment taught me that removing gel at home isn’t just about having the right tools — it’s about knowing exactly how to use them and how long to leave the remover on.[1]
After that first disastrous attempt, I spent the next week researching every single method I could find on how to remove gel from nails at home. I tested several products, used different techniques, and even asked a few professionals for their advice. What I learned changed my approach entirely. I discovered that the right combination of tools, products, and patience could make the process not only effective but also gentle on my nails. Now, I can remove gel at home in under 20 minutes, and my nails look just as good as when I first applied the gel. It's a skill that’s worth mastering, especially if you’re someone who loves to experiment with different nail styles.
Why You'll Love This Method
- It’s gentler on natural nails than salon methods in most cases.
- You can do it at your own pace with no time pressure.
- It avoids the risk of nail lifting or chipping from improper removal.
- You save money and time by skipping the salon.
What You Need Before You Start
As of November 2026, before you begin, make sure your nails are clean and free of any polish or residue. This helps the remover work more effectively. I like to use a cuticle pusher to gently push back any dry skin around the nail beds before applying the remover. This step is crucial because it prevents the remover from getting trapped under the cuticles, which can cause irritation or even damage.
The next step is to apply the acetone remover to a cotton pad and press it firmly against each nail for about 10 seconds. I’ve found that using the remover for less than 10 seconds doesn’t do much, while more than that can dry out the nails. The cotton pad should stay in place until the gel starts to soften. This usually takes about a minute or two, depending on the thickness of the gel.[2]
Once the gel has softened, I use the buffer block to gently scrape the gel off the nail. I start from the tip and work my way back toward the nail bed. It’s important to be gentle here — aggressive scraping can tear the nail or cause it to lift. After scraping, I use a soft cotton pad to wipe away any excess remover and residue. This leaves the nail clean and ready for any post-removal care.
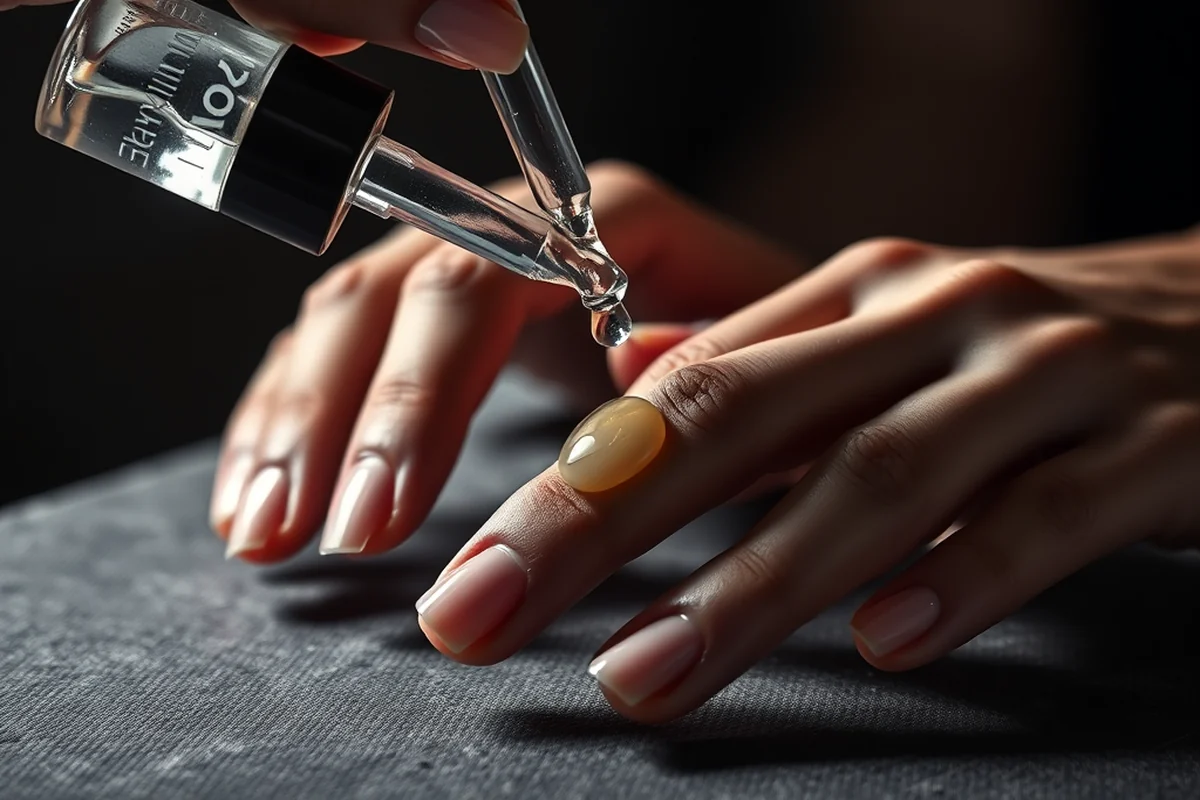
After removing the gel, I always apply a few drops of hydrating oil to each nail. This helps restore moisture and prevents the nails from becoming dry or brittle. I prefer jojoba oil because it’s lightweight and absorbs quickly.
The Patience Game: Time vs. Results
I used to think that the faster I removed the gel, the better. But after several frustrating attempts, I realized that taking the time to let the remover work its magic is actually the best approach. I now give each nail about 2-3 minutes with the remover, and I don’t rush the scraping process. This prevents the nail from lifting or cracking, which I used to do repeatedly.
One of the most important lessons I learned was that even if the gel starts to come off quickly, I should still wait until it’s fully softened before scraping. This might seem like a longer process, but it’s crucial for protecting the natural nail. I also found that applying the remover in multiple passes over the same nail is more effective than trying to do it all at once.
Patience is key here. I’ve seen people try to scrape the gel off immediately after applying the remover, only to end up with a mess and damaged nails. Taking even an extra minute or two can make a big difference. It's worth the extra time to avoid any unnecessary damage.
A little patience can save your natural nails from a lot of stress.
Related: What is a polygel nail kit
Choosing the Right Remover for Your Skin
I once tried a remover that was labeled as 'gentle' but still caused my cuticles to become red and sore. It turned out that the remover had a high concentration of acetone, even though it was marketed as a mild option. This taught me that the label doesn’t always tell the whole story.
I now look for removers that have a lower percentage of acetone, typically around 80-90%, and that include ingredients like vitamin E or aloe vera to help protect the skin and nails. These types of removers are more likely to leave my nails feeling smooth rather than dry and cracked.
Another thing I’ve learned is that it’s better to use a cotton pad or ball rather than a cotton swab. Cotton swabs tend to be too small and can cause uneven application, which can lead to some areas of the nail being over-exposed to the remover. This can cause unnecessary damage and dryness.
When choosing a remover, look for ones that are labeled as 'skin-friendly' or have added moisturizing agents. Avoid any removers with harsh chemicals or perfumes, as these can irritate the skin around the nails.
“I remember the first time I tried to remove gel nails at home.”— Gel Nails for Beginners editors
Related: What is japanese gel manicure
Scraping Techniques That Work
I used to press too hard when scraping, which often caused the gel to come off in pieces or leave behind tiny bits that were hard to remove. I’ve since learned that a gentle, consistent motion is more effective. I now use a soft buffer block and apply just enough pressure to scrape the gel away without damaging the natural nail.
Another tip I’ve picked up is to scrape in one direction only — from the tip of the nail toward the base. This helps prevent the gel from getting pulled back onto the nail, which can create a mess and make the process longer. I also try to avoid using the same area of the buffer block repeatedly, as this can wear down the tool quickly and reduce its effectiveness.
I now scrape each nail in a slow, deliberate motion, making sure not to rush. This helps ensure that the gel is removed evenly and that the natural nail isn’t left with any rough edges or uneven texture. It might take a little longer, but the results are worth it.
Related: Gel nail art designs
Post-Removal Care: What You Should Do
I always make sure to apply a hydrating oil or cuticle cream immediately after removing the gel. This helps replenish any moisture lost during the removal process and prevents the nails from becoming dry or brittle. I’ve noticed that skipping this step can leave my nails feeling rough and prone to breaking.
Another step I take is to avoid using any harsh chemicals or nail polish for the next 24 hours. This gives my nails time to recover and prevents any further irritation. I also make sure to keep my hands moisturized throughout the day, especially if I’m doing any manual work or washing my hands frequently.
I’ve found that using a gentle nail buffer after removal can also help smooth out any rough edges left behind. I apply the buffer in a circular motion, being careful not to press too hard. This helps maintain the natural shape of the nail while keeping it smooth and even.
Related: Builder gel for manicure
The Importance of Testing Before You Commit
I used to skip this step, thinking that my technique was already solid. But after a few attempts where I ended up with a damaged nail, I realized that testing on a single nail first was a smart move. This allows you to see how the remover affects the nail and whether your technique is working properly.
When I first started, I tested the removal process on one of my thumbnails. This helped me see if the remover was working effectively and if I was applying the right amount of pressure when scraping. It also allowed me to adjust my technique if needed before moving on to the rest of my nails.
Testing is especially important if you’re new to the process or if you have sensitive skin. It gives you the opportunity to troubleshoot any issues before they become bigger problems. It’s a small step that can save you a lot of time and effort in the long run.
Test first — it’s the difference between success and a disaster.
Related: What s liquid gel nails
Avoiding Common Mistakes That Damage Nails
One mistake I used to make was using the same cotton pad for multiple nails. This can lead to the pad becoming saturated with remover, which reduces its effectiveness and can leave residue on the nails. I now use a fresh cotton pad for each nail to ensure that the removal process is as effective as possible.
Another mistake is not waiting long enough for the remover to work. Rushing the process can cause the gel to come off unevenly, which can leave behind small bits of gel that are hard to remove. I now make sure to give the remover at least 2-3 minutes on each nail before scraping.
I’ve also learned that using a metal tool to scrape the gel off is a big no-no. Metal tools can be too harsh and can cause the nail to lift or crack. I now use a soft buffer block or a plastic scraper instead, which is gentler on the natural nail.
🌿 Sensitive Skin
If you have sensitive skin or nails, opt for a low-acetone remover and avoid aggressive scraping techniques.
💰 Budget
A budget-friendly approach can include using a basic acetone remover and reusing cotton pads as much as possible.
🧹 Minimalist
Use a single tool like a buffer block and a cotton pad to keep the process simple and efficient.
🎯 Targeted
Focus on specific nails that are lifting or chipping first, rather than attempting to remove the entire set at once.
🛠️ Maintenance
For regular maintenance, use a gentle remover and keep your nails hydrated to avoid damage and prolong the life of your gel manicure.
| The mistake | Why it happens | The fix |
|---|---|---|
| Using a metal tool to scrape gel off the nails. | Metal tools can be too harsh and can cause the nail to lift or crack. | Use a soft buffer block or a plastic scraper instead of a metal tool. |
| Not waiting long enough for the remover to work. | Rushing the process can lead to uneven removal and damage to the natural nail. | Leave the remover on each nail for at least 2-3 minutes before scraping. |
| Using the same cotton pad for multiple nails. | This can cause the remover to become less effective and may leave residue on the nails. | Use a fresh cotton pad for each nail to ensure the best results. |
| Not applying post-removal care. | Skipping this step can leave the nails dry and brittle, making them more prone to damage. | Apply a hydrating oil or cuticle cream immediately after removing the gel to keep the nails healthy. |
How To Remove Gel From Nails At Home
Common Questions
Can I reuse the cotton pads after applying the remover?
How long should I leave the remover on each nail?
What should I do if the gel is still stuck after using the remover?
Is it safe to use a metal tool to scrape off gel?
References
- BarberCosmo - California Board of Barbering and Cosmetology (barbercosmo.ca.gov)
- How To Apply Nail Polish (jfd.jacksonms.gov)
Cite this guide
Gel Nails for Beginners (2026). How To Remove Gel From Nails At Home. https://careandnail.com/how-to-remove-gel-from-nails-at-home/
Feel free to cite or share this guide.